From experience, I have learned that the "how did you do that?" question is inevitable. That's why we all do this stuff, right? That's how I got hooked, at least...the rest is history. Well, I don't have a printed template, but I hope that these step by step directions will help.
What you will need:
- 8.5" x 11" piece of cardstock (I used Kraft)
- Scoring utensil (Such as a Scor-Pal or the scoring "blade" on your paper cutter)
- Adhesive (I am a glue person, so that is what I am going to go ahead and recommend for this project)
- Small round punch
- Thin ribbon or cording (optional, if you want to hang this lil' house)
- Other paper, stamps and embellishments for making the house your own. I used the new set, Fresh Flowers.
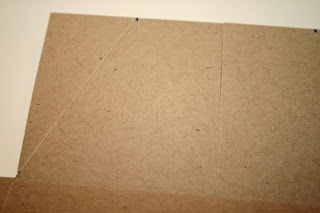
Score your paper at 2.5", 5", 7.5" and 10" and 2.5" inches in from either side. Cut flaps to intersecting line.
Step Two:
Mark the center point (1.25") on each of the top flaps.
Step Three:
Create scored triangle by scoring from marked center point to lower corners of each flap.
Steps Four and Five:
Cut approximately 1/4" on the outside of each score mark. Using a bone folder, make a "hard" score mark by folding down at scored lines and running bone folder across. This will help create smooth lines when the flap are glued together.
Step Six:
Punch a hole in the top portion of two (not side by side) of the flaps/triangles.
Step Seven:
Glue flaps together. You can use red line tape here, but I find that glue is more permanent, so that is what I chose to use.
Step Eight/Completion:
Fill with your choice of goodies and fold and adhere bottom flaps. Decorate house as desired. Here is a picture of the "naked" house...
For the roof, I use the larger SU! oval punch and sponged the edges of each piece. I kinda got glue everywhere and need to be a little more careful next time I do a project like this! Here is a top view of the complete house...


11 comments:
This is too cute!
holy moly this is cute cute cute Jen!
this is awesome!!
Wow, this is stunning! What a fantastic project.
Ack! That's awesome! Seriously, girl, you ROCK!
Oh wow I love this and the directions actually seem like something I could follow!
Fabulous project! I was just going to ask you about the template and/or directions on your blog - teehee! Thanks for sharing...Thanks for directing me to this site as welll - lots of great projects!
Alma =)
How adorable is this! Fabulous project Jen, and thanks for the step by step instructions. :)
This is to Die for. Fantastic and what a great tutorial. I might even be able to do this!!!
Super fabulous - Jen!!! I love this gift idea!!!
This is so cute, I HAVE TO DO ONE NOW. Thank you for the tutorial. I've left something for you on my blog.
Post a Comment