Showing posts with label Downtown Diva. Show all posts

Tuesday, August 18, 2009

A Magnetic Cuppie Frame!!

Hi everyone!! Happy Tuesday! I have a cuppie project to share with you all today!!

It's not secret that I LOVE cuppie (grin!), and I really wanted to make a new frame for my desk at work. In cubicle land, there isn't too much room for decor, so I came up with an easily alterable frame so I can put pictures of my sweet daughter and just change up the occassion!!
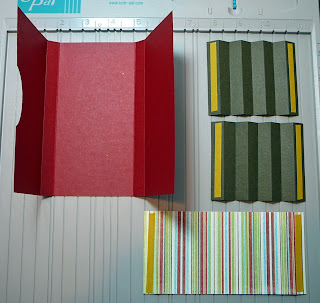
I started with a super cute little frame that I picked up at my local craft store. I painted the edges with some acrylic paint (Eggshell by Americana) and then, using Zip Dry (a totally FABULOUS glue!), I adhered this super fun Cosmo Cricket patterned paper to my frame!

I punched out six self-adhesive business card magnets (I got mine from Staples) with my 1 1/4 Circle Punch, one to adhere to my frame, the other five to adhere to my cuppies!! I sponged all around my frame to soften it up with some Creamy Caramel ink and a sponge dauber, and I added Taylor's Tiny Twinkles all around the frame opening! I LOVE the pop of bling that these bring to any project!!

Now, the REALLY fun part started!! I stamped five different cuppie images in Memento Tuxedo Black onto Choice Buttercream Cardstock and colored them all with Copic Markers. The are all cut out and layered with Circle Nestabilities, and just like the frame, I sponged each one to soften them up. They each have a magnet adhered to the back so I can just switch em' out! Easy peasy!!

For my birthday frame, I used the Cuppie with balloons from the Doctor's Orders set, but I masked out the "Get Well Soon" sentiment to make it a birthday Cuppie!! The sentiment, "Happy Birthday", is from Fresh Flowers!

My little one is starting nursery school in September, so I HAD to use this super sweet Cuppie from A Year of Sweets 3, and the sentiment, "You Did It", is from A Year of Sweet Sentiments!!
I LOVE to shop with my little sweetie, so I stamped these shopping Cuppies from Downtown Diva for my next frame accent! The sentiment, "Friends Like You Are Priceless", is also from this set!!
Although we live on Long Island, we NEVER go the beach...so my daughter thinks that the ocean is in Maine where we go on vacation!! I had to make a beach frame accent, so I stamped this sand castle building Cuppie from Beach Bum, and the sentiment, "Beach Bum" is from the same set!!
Lastly, I knew I wanted a Christmas Frame, so I stamped this ADORABLE reindeer Cuppie from Season's Sweetings for this frame, and the sentiment, "Merry Christmas" is also from the same set!!
This frame has limitless options!! I plan on adding more accents to my frame with more Cuppies!! I hope I have inspired you to make your own magnetic frame!!!
Thanks so much for stopping by!! Make sure to sign up for the Taylored Expressions newsletter so you can keep up to date on all the exciting happenings at Taylored Expressions!!!
Recipe:
Stamps: Doctor's Orders, Fresh Flowers, A Year of Sweets 3, A Year of Sweet Sentiments, Downtown Diva, Beach Bum & Season's Sweetings all from Taylored Expressions
Paper: Choice Buttercream Cardstock, Intense Kiwi, Sunflowers Medium & Frosted Teal by Prism and Early Bird from Cosmo Cricket
Ink: Memento Tuxedo Black and Creamy Caramel
Accessories: Acrylic Paint (Eggshell from Americana), Magentic Business Cards, Frame, Zip Dry Glue, Foam Tape, Taylor's Tiny Twinkles, Sponge Dauber, Copic Markers and Circle Nestabilities
Jodi

Tuesday, May 26, 2009

Shop {for Copic Markers} 'Til You Drop!!

Hi everyone! Happy Tuesday!!

I have a fun little project to show you today!! Now, I love to stamp, I love to buy stamps, paper, ink and most recently, I love to buy Copic Markers!! Not only do I love to buy all these things, and use all these things, I also love to organize my supplies!!

In order to organize and keep track of my growing collection of Copic Markers, I decided to make a Copic Marker Chart Book!!!

I started by creating a table in Word listing the number and name of each and every Copic Sketch Marker available, and I also made two columns, one to mark off when I own the marker, the other to mark off when I own the re-inker!!

**If anyone is interested in this Word Document, please leave a comment here and I will email it to you! I can't figure out how to attach the file to this post!! Thanks!! **

After printing out my table, I then colored in each Copic Marker that I have, along with the re-inker's that I have. I then trimmed each page, leaving a 1 inch border on the left side to leave room for the binding.

For the cover of my book, I used this yummy Teal cardstock from the Father's Day Key Ingredients from Taylored Expressions. I used my Scor-Pal to create a scrapbook type of binding. I used my Crop-A-Dile to punch three holes in my Copic Chart as well as the cover, and then attached them with three brads.

I stamped these GORGEOUS flowers from Fresh Flowers by Taylored Expressions in Memento Tuxedo Black onto Choice Snow White Cardstock, and framed it with Oval Nestabilities. I colored my flowers with Copic Markers, and the sentiment on the bottom of my book is from Downtown Diva and was punched with my Word Window Punch and layered on a Scallop Oval, 1 1/4 Inch Circle and 1 3/8 Inch Circle Punches!!!

All the cardstock, patterned paper and ribbon on this project are from the Father's Day Key Ingredients. I finished off my card with some paper piercing!!!!

This book has a place on honor on my stamp desk already! It makes it SOOO easy when ordering more Copic Markers (grin!!), and I also love it as a guide to see what colors I want to use on a project!!

Thanks SO much for stopping by!! I hope you enjoy my Copic Marker Chart Book!!!

Recipe:
Stamps: Fresh Flowers and Downtown Diva by Taylored Expressions
Paper: Choice Snow White and Cardstock and Patterned Papers from the Father's Day Key Ingredients
Ink: Memento Tuxedo Black
Accessories: Ribbon from Father's Day Key Ingredients, Paper Piercing Tool and Template, Copic Markers, Oval and Scallop Oval Nestabilites, Scallop Oval, 1 1/4, 1 3/8 Circle Punches, Word Window Punch and Dimensionls

Jodi

Tuesday, April 14, 2009

MJ's Cuppie Memory Game!

Hi everyone!! Happy Tuesday!! Here is a little project I created for my daughter Meredith, who we call M.J.!!!
She LOVES to stamp with me, so I wanted to create something just for her! I am always inspired by other stampers when they create games, so I thought I would try my hand at it!! So...here is M.J.'s Cuppie Memory Game!
This was actually a VERY easy (although a bit time consuming) project! I started by pulling out this cute little clear paint can I picked up at my local craft store. (I just KNEW I would find a use for it sometime!!) It is quite small, measuring only three inches tall! Once I determined that I wanted to go with a primary color scheme, I tied on bunches of fun, bright ribbons around the handle, ranging from polka dot to solid grosgrain.


Next, I stamped the two different Diva cuppies from Downtown Diva, 9 times each, in Memento Tuxedo Black onto Choice White Cardstock for a total of 18 "chips". I then colored the liners and flowers in different colors with my Copic Markers, two matching cuppies for each color. After I colored all of them (and boy, that was FUN!), I punched them out with my 1 3/8 Inch Circle Punch. Each cuppie was then layered onto a 1 1/4 Circle Punch of the same color of their respective liners. I didn't have a large enough circle punch to create my last layer, so I used a Circle Nestabillity for the largest circle. Here is a close-up of one of my red cuppies.


The largest circle on each and every cupcake states the name of the game, "M.J.'s Cuppie Memory Game", which I created with my JustRite Monogram Stamper. Once I got all the letters on and centered, it was an absolute breeze to stamp all of them!! (NOTE: I stamped all 18 and then cut them out with the Circle Nestability...I personally found it much easier that way!).


After I assembled and adhered my layers (cuppie, colored circle of cardstock, final circle with the name of the game facing the opposite way), I coated the entire "chip" with Glossy Accents and let them all dry overnight. Once they dried, they are nice and stiff...and pretty darn resistant to three year old shenanagins!!


To finish off the lid of my paint can, I stamped the name of my game again with my JustRite Stamper, this time adding a border. I then stamped one of the flower stamps from Downtown Diva in several different bright colors right over the title to add some fun. I finished it off with a Scallop Nestability in Real Red, that fit perfectly onto the lid!!


M.J. has already played the game several times and she just LOVES it! I think I will make some more of these for the numerous parties we have coming up! Doesn't everyone love a personalized gift?

For all the latest news, information and inspiration, don't forget to sign up for the Taylored Expressions Newsletter. You'll find the link on then left sidebar of the TE Store homepage.

Thanks so much for stopping by!!
Recipe:
Stamps: Downtown Diva - Stamp A Sweet Impression and JustRite Stamper
Paper: Choice White Cardstock from Taylored Expressions and Real Red, Pacific Point, Gable Green, Elegant Eggplant, Tempting Turquoise, YoYo Yellow, Only Orange, Lovely Lilac and Glorious Green from SU!
Ink: Memento Tuxedo Black
Accessories: 1 3/8 Inch Circle Punch, 1 1/4 Inch Circle Punch, Circle and Scallop Circle Nestabilities, Copic Markers, Glossy Accents, assorted ribbons and clear mini paint can.

Jodi

Thursday, April 9, 2009

A Diva's Receipt/Coupon Organizer

I'll admit it...I'm one of those people who shoves receipts and coupons into the black hole, otherwise known as my purse, never to be seen or used again. I'm organized for some things, but definitely not for receipts and coupons. As soon as I saw the Downtown Diva set I KNEW I needed to make myself an organizer to keep in my purse. So here's what I came up with! 


The image from Downtown Diva is stamped with Memento Tuxedo Black onto Choice Snow White and coloured with copics. I cut it out using my Labels Two Nestabilities by Spellbinders. All the paper and ribbon are from the March Key Ingredients and the rhinestones are from the Mother's Day Key Ingredients. Have you signed up for your Key Ingredients subscription yet? I absolutely LOVE the Key Ingredients...coordinating products in one package...it's super easy to whip up projects using the Key Ingredients, and the subscription service is packed with extra value! 

But wait a second...did you notice that there are two green and one blue rhinestone, in addition to the clear ones? Well, I discovered that you can colour your rhinestones with copic markers...so the green and blue ones started out as clear ones from the Mother's Day Key Ingredients. 

Here's a tutorial I put together so you can build your own Receipt/Coupon Organizer...just in case there are other "black hole" purse carriers like me!  :)

Start with a 6x9.75 inch piece of red cardstock. Score it at 3, 3.5, 6.5, and 7 inches. This will make the body of your organizer.

Next cut two pieces of brown cardstock to 3x4 inches. You'll score both of these every half inch, at .5, 1, 1.5, 2, 2.5, 3 and 3.5 inches. Then accordian fold both pieces...these will create your sides. I wanted the sides to be accordian folds like a file folder, so that the top would open up wider than the bott0m...easier to put receipts in and get coupons out.

Next I chose one of the striped cardstock pieces for the divider. It's cut to 3x6 inches and scored at half an inch from each end. 

Then I used an oval punch on the red base piece, to create a little opening. Be sure you're punching the end panel that measures three inches, because the slightly smaller end is the one that creates the front flap. 

Next add a strong adhesive to the ends of the accordian folded pieces and to the ends of the divider piece. Taylor's Sticky Tape would be perfect for this. 

You'll adhere one end of the accordian fold piece to the inside of the front panel and the other end to the inside of the back panel. Repeat for the other side, then adhere the ends of the divider piece to each accordian piece. 

To keep the front flap closed I added some self adhesive Basic Grey magnets. The easiest way to line them up is to adhere a magnet to the inside of the flap, take your second magnet and let it attach itself (magnetically) to the first magnet, then close your flap. Presto...magnets are aligned. 

Then I added another of the patterned papers from the March Key Ingredients to hide the magnet on the front of the Organizer. I left the other magnet exposed for two reasons: 1) it doesn't really show except when I open the organizer. 2) I didn't want another layer of cardstock to take away the strength of the magnetic connection. 

Once your Organizer is built you can decorate it to suit your Diva style! 
For all the latest news, information and inspiration, don't forget to sign up for the Taylored Expressions Newsletter. You'll find the link on then left sidebar of the TE Store homepage

Thanks for stopping by!
Karen